Most commercial roofs don’t die from old age. They die from water that got in somewhere nobody looked, at a moment when fixing the entrance would have cost a few hundred dollars instead of a full tear-off.
That pattern repeats across Bergen, Passaic, Essex, and Morris counties, and it’s the reason so many property managers get blindsided in March after a winter they thought they sailed through. A roof doesn’t fail all at once. It fails at the seams, the penetrations, the drains, and the transitions, and it fails quietly until the morning your tenant calls about a wet ceiling tile.
Here’s the good news: you can catch almost all of it early if you know the freeze-thaw loop this region runs from November through March, and if you know which details to look at yourself before you call anyone. When the problem does need a trade, that’s the point where most owners start collecting quotes from commercial roofing contractors in North Jersey. Picking one well matters, but knowing what failed matters more, because a vague complaint gets you a vague price.
What I’d tell anyone responsible for a building this week: spend twenty minutes on the roof before you call anybody. Ten of them you’ll spend on the four photos below. The other ten you’ll spend standing still and looking at the low corner.
The freeze-thaw loop is the real enemy, not the snow
Snow sitting on a roof is annoying. Snow melting and refreezing is what wrecks it.
Every melt cycle pushes water into a tiny opening, and every refreeze expands that opening. Your county might see dozens of those cycles in a single season, and that’s the mechanism, not the storm. The National Park Service explains how repeated freezing and thawing breaks rock apart over time, and the same physical process is what widens a seam or lifts flashing on your roof.
Flat and low slope commercial assemblies are especially exposed, because water doesn’t leave on its own. It sits there and waits for the next overnight freeze.
Where it hits first
- Seams and laps on the membrane, especially anywhere the roof plane changes direction
- Pipe boots, vent stacks, HVAC curbs, and every fastener that penetrates the surface
- Drain bowls and scuppers that have collected grit through the fall
- Flashing at parapet walls, and the counterflashing joints above it
- Cap sheet edges near a metal drip edge, where wind gets underneath
I’d rank flashing transitions as the number one culprit for a building in this climate. Not because the material is bad, and not because installers are careless, but because that’s where two different systems meet and where the most small errors can hide for years.
Four things you can check yourself before you call anyone
You don’t need a moisture meter or a drone to catch the obvious stuff. You need daylight, a phone camera, and a ladder you’re comfortable on. If you’re not comfortable on the ladder, that’s fine too. Look up from the parking lot instead and watch for the water stains you’ll see in step one.
The Interior Water Map. Walk the top floor and the ceiling below the roof. Photograph every brown ring, no matter how old it looks. Water travels sideways along decking before it drips, so the stain is almost never directly under the leak. That gap between where you see the mark and where the water actually enters is why so many repair visits start with a guess that turns out to be wrong.
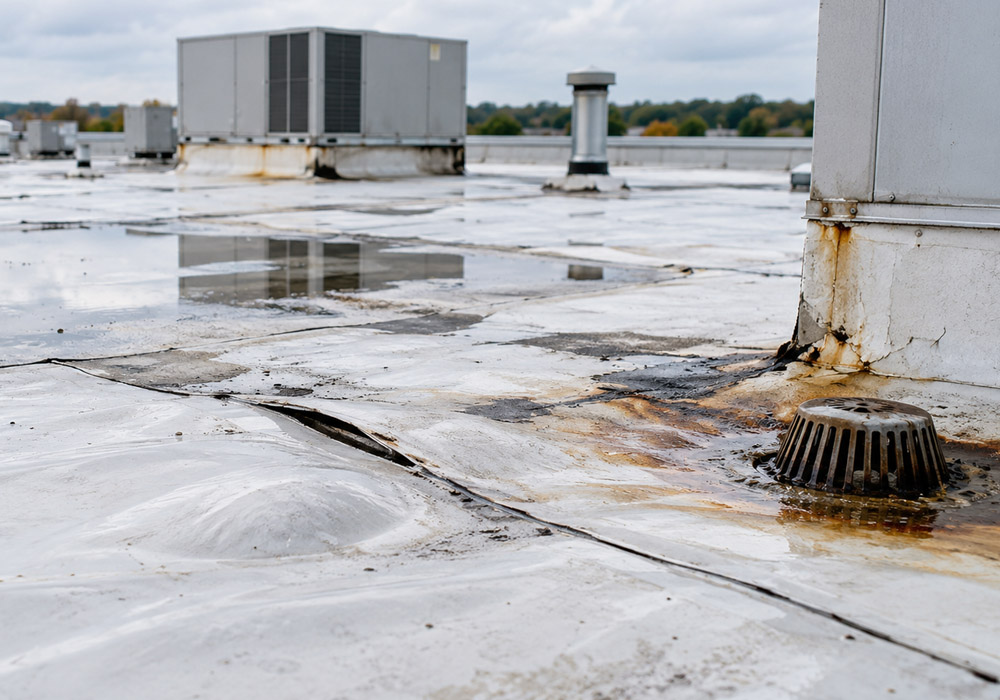
The Ponding Clock. After a real rain, note how long water stands in any low spot. Standing water is normal for a short while. Standing water that’s still there two days later is a drainage design problem, and it’s eating your membrane from the underside of that puddle. Photograph it with something in frame for scale, like your shoe.
The Blister Press. A soft, spongy patch that gives underfoot usually means trapped moisture has separated the layers. It feels a little like walking on a padded mat. Don’t step on it, and definitely don’t puncture it. Just mark the location and take the photo.
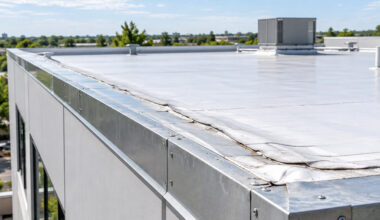
The Taped Seam Test. Walk the perimeter and look at how the seams between membrane sheets are sealed. If the cap along a metal edge or flashing is loose enough to lift with two fingers, or you can see daylight through a joint, that’s a repair, not a replacement, and you want somebody out before the next cold snap.
Repair, coat, or replace: a decision framework
This is where owners lose the most money, and usually in one direction. They replace a roof that had years left, because a contractor with a full schedule told them it was time.
Here’s the framework I’d use, in this order. Save it.
One: Is the moisture in more than roughly a quarter of the roof area? If yes, a coating will trap that moisture and make the decking problem worse, and you’re looking at replacement. If it’s one or two isolated spots, keep reading.
Two: What’s the age against the manufacturer’s expected service life? If the assembly is past it, don’t spend on a coating you’ll only remove next year.
Three: What’s the cost of one day of lost operations versus the cost of the roof work? This decides urgency more often than the roof’s condition does, and it’s the number most owners never calculate.
Four: How long are you keeping this building? If you’re selling or refinancing in two years, a repair plus documented drainage fixes might be the honest answer even if a replacement would look better on paper.
If those four push toward replacement, bear in mind that modern roof assemblies are engineered as complete systems, and the U.S. Department of Energy maintains resources on how building envelope performance affects energy use over the life of the roof, which is worth a look before you choose materials on price alone.
The estimate meeting decides everything
Two hours is the right amount of time for a commercial roof inspection and estimate. If somebody walks the roof for ten minutes and hands you a number in the parking lot, you’ve learned something about the company.
So ask two questions. How long has it been since the last documented inspection of this roof, and what specifically failed since then? Then ask for the scope in writing, with photos attached, in plain language. A crew that brings a moisture meter, probes the soft spots, and separates repair items from replacement items in the quote is doing the job properly. A crew that can only talk in one option is selling, not assessing.
Also pull your local weather records for last winter before the meeting. The National Oceanic and Atmospheric Administration keeps climate data going back decades, and a printout of last winter’s temperature swings on the table makes the conversation concrete instead of theoretical. Contractors respond to prepared owners differently. It’s not subtle.
What you’re actually buying
You’re not buying shingles, membrane, or a coating. You’re buying the next ten winters without a surprise, and that purchase lives or dies on whether the membrane, the flashing, and the drainage all get planned as one system with one warranty behind them.
Any contractor worth hiring will give you an inspection write-up you can hand to your board, your insurer, or your accountant without a rewrite. If the paperwork looks like a sales sheet, treat it as one.
Take the four photos this week. When you have water stains, a ponding problem, and a loose cap sitting in the same file, finding a contractor who’ll level with you about which one actually matters is a much shorter conversation.