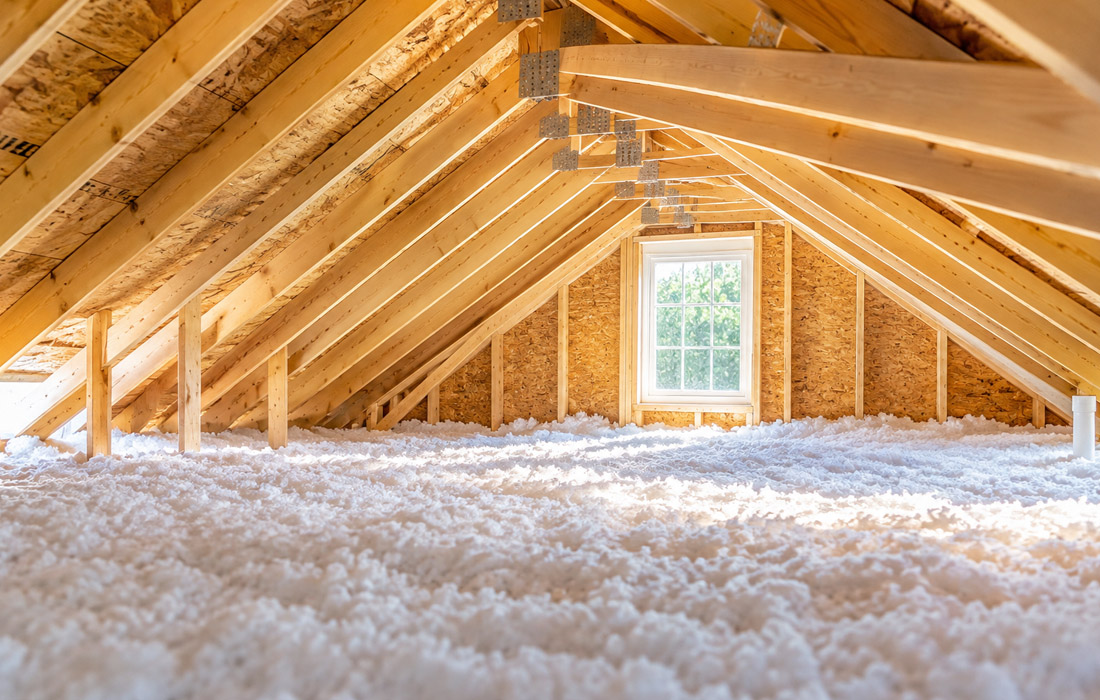
The most consequential decision in an attic upgrade is not which material to buy, but where to place the thermal boundary. Insulating the attic floor keeps the living space separate from a vented attic, while insulating the roof deck brings the entire attic into the home’s thermal envelope, explains Keyrenter Folsom. The right choice depends on ducts and air handlers in the attic, existing ventilation, knee walls, storage, and how easily air leaks can be sealed. Getting this call right determines comfort in the rooms below, equipment longevity, and long-term moisture control as much as any advertised R-value.
Choose Your Thermal Boundary: Attic Floor or Roof Deck
Insulating the attic floor is usually the simplest path: air-seal the ceiling plane and add blown-in cellulose or loose-fill fiberglass to reach target R-values. If your HVAC and ducts are in the attic, however, sealing and insulating the roof deck with spray foam can be a better fit because it encloses that equipment within conditioned space and reduces heat gain and loss through the ducts. A reputable contractor such as First Defense Insulation can evaluate the interaction among duct location, soffit and ridge vents, and knee walls before recommending where the boundary should be placed.
Roof-deck insulation changes how the attic works. A foamed roof deck generally eliminates the need for traditional soffit-to-ridge ventilation, while a vented attic with floor insulation relies on clear baffles at the eaves to maintain airflow above the insulation. There are trade-offs: roof-deck foam often costs more and can make roof leak detection more difficult, while floor insulation leaves a hot attic that can stress the ducts. If you store items in the attic, floor insulation demands raised platforms and insulation dams; a conditioned attic may make storage easier but can trigger ignition-barrier requirements around foam in areas with equipment or access.
Air Sealing First: Controlling the Stack Effect
Air sealing sets the stage for any insulation to work. Warm air rises and escapes through top plates, plumbing stacks, wiring penetrations, and open chases around chimneys and bath fans; outdoor air then sneaks in at the bottom of the house to replace it. Use caulk or foam at small gaps, rigid foam with sealed seams over larger chases, and gasketed covers for the attic hatch or pull-down ladder. Seal around the flue surrounds with non-combustible materials and keep the required clearances from heat sources. Once those leaks are closed, blown-in cellulose or fiberglass performs closer to its rated R-value because wind washing and convective loops are reduced.
Lighting often undermines air sealing. Recessed can lights that are not IC-rated should be isolated with a tested fire-rated cover before insulation is added, or, better yet, replaced with sealed IC-rated LED fixtures. Even a handful of leaky cans can short-circuit the envelope by creating chimney-like openings. Similarly, the top plates of interior walls, especially near dropped soffits and tub surrounds, should be foamed or caulked before the insulation blower ever leaves the truck.
Moisture Paths, Vents, and Baffles: Protecting the Roof Deck
Moisture rides on air. A bathroom fan that exhausts into the attic can dump pints of water vapor where you least want it, raising the risk of mold on the sheathing. Always duct-bath fans to the exterior using a smooth-walled metal duct or a properly supported, insulated flex duct, with a tight backdraft damper at the termination. In a vented attic, install soffit baffles so intake air flows over the insulation rather than through it, which reduces wind washing at the eaves and keeps the R-value consistent along the perimeter.
Vapor retarders deserve careful thought. In many homes, standard latex paint on drywall serves as a class III vapor retarder, which is adequate when air sealing is thorough. Installing an impermeable layer in the wrong place can trap moisture; climate and assembly matter here. Regardless of climate, the most reliable moisture control is rigorous air sealing paired with either a clear ventilation path above the insulation (vented attic) or a continuous, well-adhered air barrier at the roof deck (conditioned attic).
Lights, Flues, and Hatches: Safety Clearances That Shape the Plan
Some components set hard boundaries. Keep required clearances around B-vent flues and masonry chimneys, using metal flashing and fire-rated sealants to close gaps without crowding hot surfaces. Non-IC can lights should not be buried in insulation; either retrofit to IC-rated fixtures or use listed covers and maintain manufacturer-specified clearances. These details often dictate where insulation can sit and how high it can be blown, especially near mechanical platforms and chimneys.
Access points need attention too. An unsealed scuttle hole or pull-down ladder can leak as much air as a small window. Weatherstrip the lid, insulate it with rigid foam or a prefabricated cover, and build an insulation dam to keep loose fill from spilling into the hallway. Where technicians need to service an air handler, create stable walkway boards above the insulation with perimeter dams so the thermal layer stays intact when people move around.
Two Attic Case Studies and the Decisions They Inform
Case 1: A 1960s Cape with knee walls and no air barrier on the sloped ceilings suffers from cold bedrooms and summer heat. Here, sealing the knee-wall plane is mission one: add rigid foam on the attic side of knee walls with taped seams, dense-pack the short sloped cavities leading to the upper ceiling, and install baffles at the eaves. Air seal top plates and the attic hatch, then blow cellulose on the flat attic floor to the desired depth. This keeps the thermal boundary at the ceiling line, restores continuous ventilation above the slopes, and cures the wind washing that used to scour the eaves.
Case 2: A sunbelt home with an air handler and ducts in a vented attic faces high cooling bills and sweaty supply ducts. Two routes exist. The premium route brings the attic inside the envelope by spraying the roof deck and gable ends with foam, making the space semi-conditioned and gentler on ducts. The budget-conscious route leaves the attic vented: mastic-seal the ducts, add duct insulation where bare, bury them in a deep layer of loose-fill, and verify baffles keep soffits open. The trade-off is clear: roof-deck foam better addresses duct heat gain but at higher upfront cost; burying and sealing ducts helps substantially if air sealing at the ceiling is also thorough.
The fastest way to waste money on insulation is to treat it as a product instead of a system. Choose your thermal boundary based on where ducts and knee walls live, then air seal relentlessly at that plane. Verify bath fans vent outdoors, protect soffit intake with baffles, respect clearances around hot fixtures, and make the attic hatch as tight as a door. A quick self-check helps: look for dirty insulation near gaps, visible daylight at eaves, and duct tape on ducts instead of mastic. When conditions are complex, ask for diagnostic testing such as a blower door and infrared scan to confirm the plan before blowing a single bag of fill.