Understanding Mold Biology and High-Risk Indoor Areas
Mold, a type of fungus, is ubiquitous. Its microscopic spores are always present in the air, both indoors and out. However, these spores only become problematic when they land on a surface with sufficient moisture and an organic food source. Once these conditions are met, mold can quickly colonize, leading to significant structural damage and potential health issues.
The speed at which mold can proliferate is often surprising to homeowners. Research consistently shows that mold spores can begin to germinate and develop into visible colonies in as little as 24 to 48 hours after water exposure. This rapid growth underscores why immediate action following any water incident is not just recommended, but absolutely critical.
Mold thrives on moisture, but it also needs a food source. Fortunately for mold, many common household materials provide this sustenance. Wood, wallpaper, paint, carpet, ceiling tiles, and even the paper backing on drywall are all organic materials that mold can digest. The ideal temperature range for mold growth is typically between 70°F and 90°F (21°C and 32°C), making many indoor environments perfect breeding grounds.
While there are numerous species of mold, some are more commonly associated with water damage. Aspergillus, for instance, has over 150 species and can appear in various colors, making it difficult to identify by sight alone. Cladosporium is another frequent culprit, known for causing significant allergic reactions. Stachybotrys, often referred to as “black mold,” is less common but can be particularly concerning due to its potential to produce mycotoxins, though its health effects are often sensationalized. Understanding these common types helps us appreciate the diverse nature of mold and the importance of preventing its growth.
Identifying Hidden Moisture and Mold Hotspots
A challenge with mold is its ability to grow in hidden areas, often out of sight until the problem becomes severe. We often think of visible leaks as the primary concern, but even persistent high humidity or small, slow leaks can create the perfect environment for hidden mold.
To effectively prevent mold, we must become adept at identifying these potential hotspots. A “touch test” is a simple yet effective technique. Gently press on surfaces like carpet, wall panels, or drywall. If they feel damp or spongy, it’s a strong indicator of moisture, even if no visible water is present. This is particularly useful for detecting moisture behind finishes.
Common areas where mold can lurk after water damage include:
- Behind drywall or wallpaper: Water can wick up walls, saturating the paper and gypsum board, creating an ideal hidden environment.
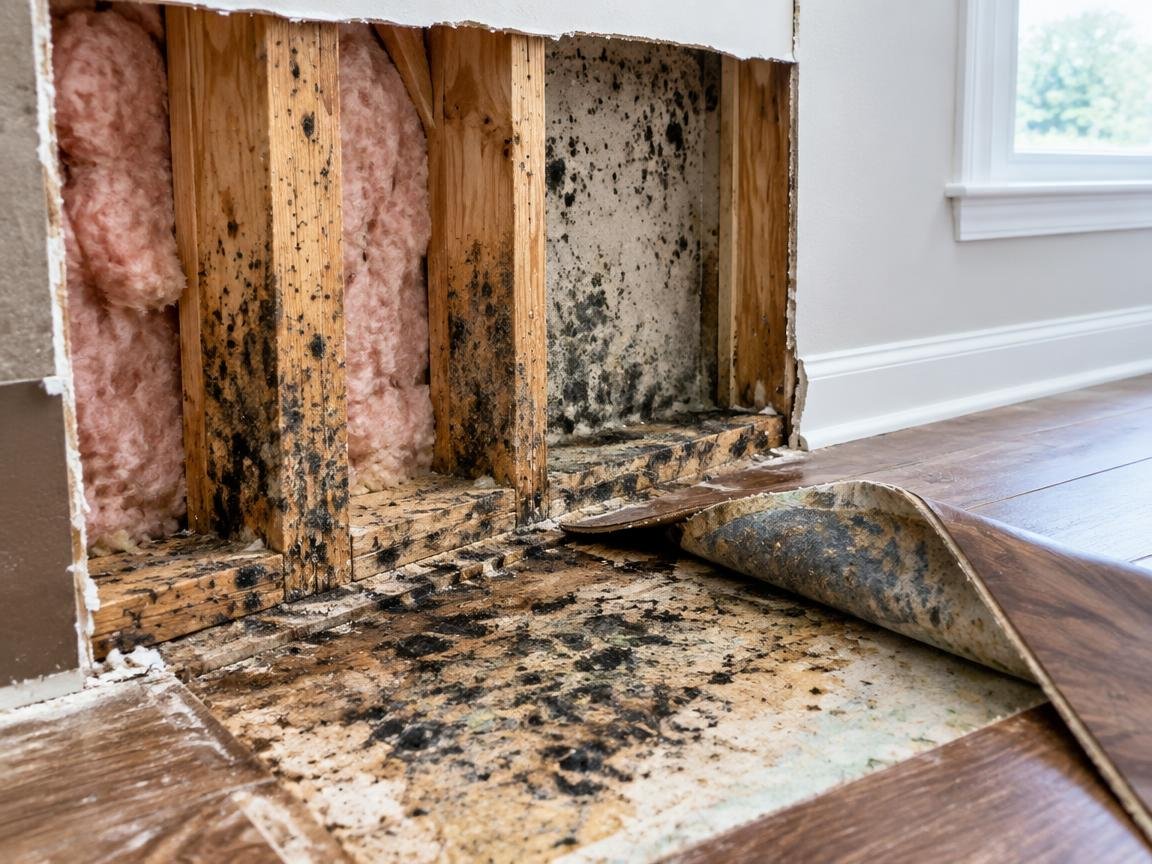
- Inside wall cavities: Leaky pipes or exterior water intrusion can saturate insulation and framing, leading to extensive hidden mold.
- Under carpet and padding: Even if the top of the carpet feels dry, the padding and subflooring underneath can remain wet for days, fostering mold growth.
- Attic rafters and sheathing: Roof leaks or poor ventilation can lead to condensation and mold in the attic.
- Crawl spaces: These areas are often damp, poorly ventilated, and prone to ground moisture, making them prime locations for mold.
- HVAC ductwork: If water enters the HVAC system, mold can grow within the ducts and spread spores throughout the home.
A musty odor is often the first sign of hidden mold. If you detect a persistent earthy or stale smell, it’s a strong indicator that mold is present, even if you can’t see it. Addressing these hidden moisture sources is crucial for long-term mold prevention.
Preventing Home Water Damage and Mold: Immediate Action After Leaks
When water damage occurs, every minute counts. Our immediate response can significantly reduce the risk of mold growth and mitigate potential structural damage. The overarching principle is simple: stop the water, then dry everything as quickly and thoroughly as possible.
The very first step is always to shut off the water supply at its source. For a burst pipe, this means turning off the main water valve to your home. For a roof leak, temporarily covering the damaged area with a tarp can prevent further water intrusion.
Once the water source is contained, focus on removing standing water. For small puddles, towels and mops suffice. For larger volumes, a wet/dry vacuum is invaluable. These powerful machines can extract gallons of water quickly, significantly speeding up the drying process. In severe cases, such as a flooded basement, professional water extraction services may be necessary.
Remember the 24-48 hour rule: it is paramount to dry water-damaged areas and items within this timeframe to prevent mold growth. This tight window is why quick action is non-negotiable. After removing standing water, deploy fans, dehumidifiers, and open windows (if outdoor humidity is low) to promote airflow and accelerate drying. Commercial-grade air movers and dehumidifiers, often available for rent from home improvement stores, are far more effective than standard household units for extensive drying.
When dealing with water damage, it’s also important to consider the category of water involved, as this dictates safety protocols and cleanup methods.
Water Damage Category Description Risks Initial Action Category 1 (Clean Water) Originates from a sanitary source (e.g., burst pipe, overflowing sink). Minimal immediate health risks. Prompt drying, disinfection. Category 2 (Gray Water) Contains significant contamination (e.g., washing machine overflow, toilet overflow with urine). Potential for illness if ingested. Prioritize cleanup, wear PPE, disinfect thoroughly. Category 3 (Black Water) Highly unsanitary, contains pathogenic agents (e.g., sewage backup, floodwaters from rivers/oceans). Severe health risks, toxic. Professional remediation only, evacuate affected areas.
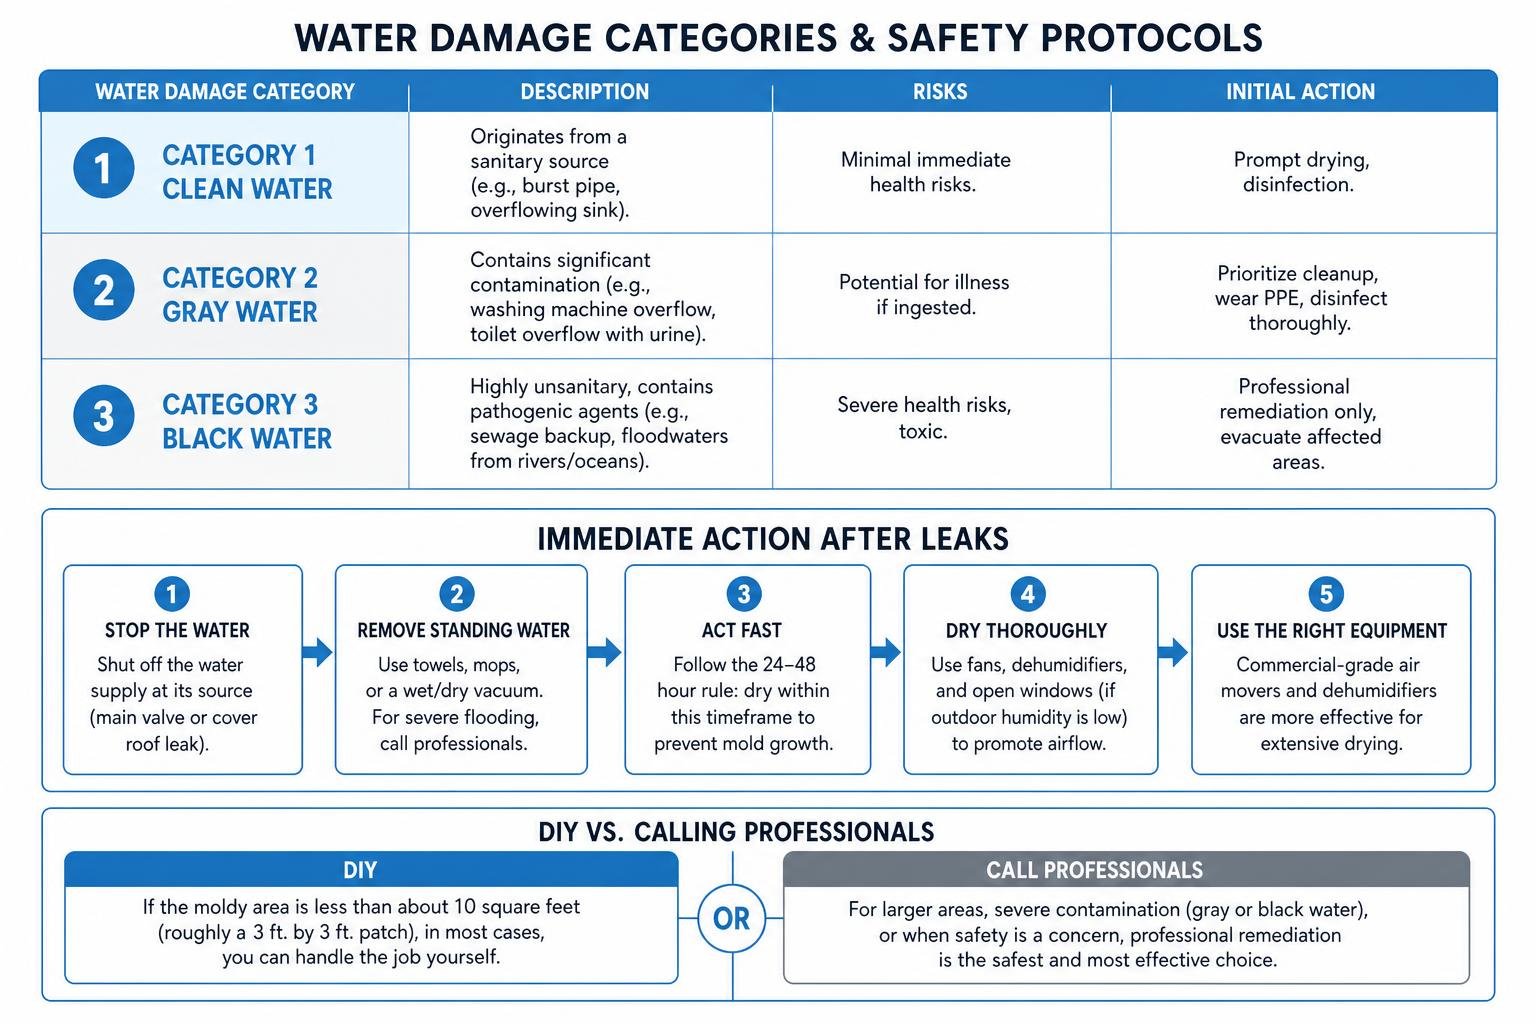
Prioritizing cleanup based on water category is a best practice. Black and gray water sources should be addressed first due to their higher risk of contaminants and potential for rapid bacterial and mold growth.
When to DIY vs. Calling Professionals for Water and Mold
Deciding whether to handle water damage and mold cleanup yourself or call in the experts is a crucial decision that impacts both safety and effectiveness. The Environmental Protection Agency (EPA) provides clear guidance: if the moldy area is less than about 10 square feet (roughly a 3 ft. by 3 ft. patch), in most cases, you can handle the job yourself.
However, several factors push the balance towards professional intervention:
- Size of the affected area: If mold covers more than 10 square feet, or if there are multiple smaller areas, the risk of cross-contamination and incomplete remediation increases significantly. Professionals have the equipment and containment strategies to manage larger infestations safely.
- Type of water damage: As discussed, if the water damage involves gray or black water, professional remediation is almost always necessary due to the severe health risks posed by contaminants.
- Hidden mold: If you suspect hidden mold due to a persistent musty odor but cannot locate the source, or if water damage has saturated structural elements like wall cavities, subflooring, or insulation, professionals are better equipped to investigate and remediate. They can use specialized tools like moisture meters and thermal cameras to pinpoint hidden moisture.
- Health concerns: If anyone in the household has allergies, asthma, or a compromised immune system, it’s safer to err on the side of caution and involve professionals, even for smaller mold issues.
- Structural saturation: When water has deeply penetrated building materials, leading to potential structural compromise, professional assessment and drying are essential.
If you decide to undertake DIY cleanup for small areas, personal protective equipment (PPE) is non-negotiable. We recommend wearing:
- N-95 respirator: This protects your lungs from inhaling mold spores. A full-face respirator is even better for extensive work.
- Goggles: To protect your eyes from spores and cleaning solutions.
- Gloves: Long, non-latex gloves are ideal to protect your skin.
- Protective clothing: Old clothes that can be washed separately or discarded, or a disposable coverall suit.
When in doubt, or for situations exceeding the DIY threshold, contacting certified professionals for water damage restoration and mold remediation is the safest and most effective course of action. They can provide a thorough assessment, develop a remediation plan, and ensure the area is properly dried and cleaned. For an unbiased evaluation of your home’s air quality or to confirm the presence of mold, consider reaching out for independent mold and air testing. Such services provide objective data, helping you make informed decisions about remediation.
Indoor Moisture Management and Environmental Control
Beyond immediate crisis response, maintaining optimal indoor moisture levels is a continuous effort that forms the bedrock of mold prevention. Mold cannot grow without moisture, making moisture control the single most important factor in keeping your home mold-free.
Preventing Home Water Damage and Mold Through Indoor Humidity Control
The EPA recommends keeping indoor humidity below 60 percent relative humidity, ideally between 30 and 50 percent. This range is critical because above 60% relative humidity, mold can begin to grow on surfaces within 24-72 hours. We can actively manage this by:
- Monitoring humidity: A digital hygrometer, which can be purchased for under $20, is an excellent investment. Place it in the most moisture-prone room (e.g., basement, bathroom) to get an accurate reading.
- Using dehumidifiers: In damp areas like basements, crawl spaces, or during humid seasons, a dehumidifier is your best friend. A properly sized unit (e.g., 30-pint for 300 sq ft, 70-pint for 700 sq ft) running continuously can maintain humidity levels within the ideal range.
- Optimizing air conditioning: Air conditioning systems naturally dehumidify the air. However, an oversized AC unit that cycles on and off too quickly may not remove enough moisture. Ensure your AC is properly maintained, with clean filters and clear drain pans, to maximize its dehumidifying effect.
- Ventilating moisture-producing activities: Always use exhaust fans in bathrooms during and for at least 30 minutes after showers. Similarly, use kitchen exhaust fans when cooking. Ensure these fans vent to the outside, not into attics or crawl spaces, which would simply move the moisture problem.
- Preventing condensation: Condensation occurs when warm, moist air meets a cold surface. To prevent this, insulate cold water pipes, especially in unconditioned spaces. Ensure adequate ventilation to remove humid air, and if possible, slightly raise the temperature of cold surfaces.
By consistently keeping indoor humidity in check, we remove the primary ingredient mold needs to thrive, significantly reducing the risk of its growth.
Restoring and Drying Water-Damaged Materials
After a water incident, thorough drying of materials is paramount. This process, often called “structural drying,” goes beyond surface-level dryness.
- Remove saturated porous materials: Items like carpet padding, heavily saturated drywall, insulation, and upholstered furniture that cannot be thoroughly dried within 24-48 hours should be discarded. These materials are highly susceptible to mold growth and can be difficult to clean effectively.
- Clean non-porous surfaces: Hard, non-porous surfaces (e.g., plastic, metal, sealed wood, tile) that have come into contact with water should be cleaned with a detergent and water solution. For areas with visible mold, a bleach solution (1 cup bleach per gallon of water, as per CDC recommendations) can be used, but always with proper ventilation and PPE. Never mix bleach with ammonia or other cleaners, as this creates toxic fumes.
- Maximize airflow: After cleaning, use high-volume fans and dehumidifiers to dry the area completely. Air movers direct airflow across surfaces, accelerating evaporation. Monitor moisture levels with a moisture meter to ensure materials are truly dry, not just surface-dry.
- Consider professional drying equipment: For extensive water damage, professional-grade air movers, dehumidifiers, and moisture meters are far more effective than household units. They can dry materials faster and more thoroughly, reaching hidden pockets of moisture.
Full drying means not just the visible surfaces, but also the internal components of walls, floors, and other building materials. Any residual moisture is an open invitation for mold to return.
Long-Term Maintenance and Structural Upgrades
While immediate action is crucial after a water event, a proactive approach through consistent home maintenance and strategic upgrades provides the best long-term defense against water damage and mold.
Preventing Home Water Damage and Mold via Exterior Maintenance and Drainage
The exterior of our homes plays a critical role in diverting water away from the foundation and preventing interior leaks. Neglecting these areas is a common pathway to water damage and subsequent mold growth.
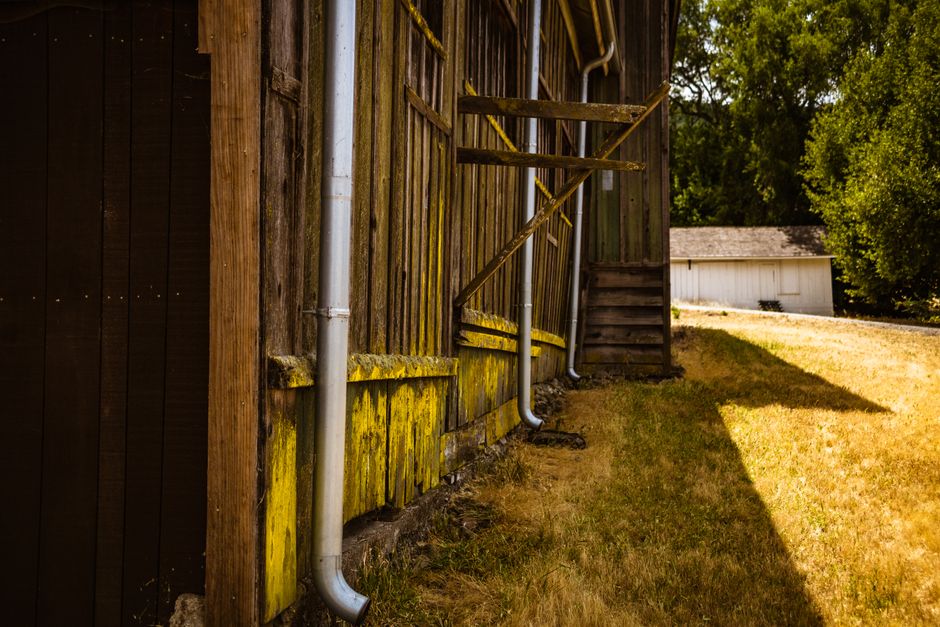
Key exterior maintenance and drainage strategies include:
- Proper ground grading: Ensure the soil around your home slopes away from the foundation. A 5% grade extending at least 10 feet from the foundation is ideal. This simple measure prevents rainwater from pooling against the house and seeping into the basement or crawl space.
- Clean gutters and downspouts: Regularly clean gutters to prevent clogs, especially in fall and spring. Clogged gutters can overflow, sending water cascading down the side of your house and saturating the foundation.
- Downspout extensions: Extend downspouts at least 5-10 feet away from the foundation to ensure water is discharged well clear of the house.
- French drains: For properties with persistent water pooling or high water tables, installing a French drain can effectively redirect subsurface water away from the foundation.
- Roof flashing: Inspect roof flashing around chimneys, vents, and skylights regularly. Damaged or deteriorated flashing is a common entry point for roof leaks.
- Window and door weatherstripping: Check and replace old or damaged weatherstripping and caulk around windows and doors. These seals prevent rain and moisture from infiltrating your home. Energy-efficient windows and doors not only stop leaks but also contribute to reduced energy bills.
These exterior measures are often overlooked but are fundamental to keeping your home dry from the outside in.
Proactive Plumbing and Appliance Protection
Many internal water damage incidents stem from plumbing failures or appliance malfunctions. Regular inspection and maintenance can catch these issues before they escalate.
- Supply line inspection: Periodically check the supply lines to your washing machine, dishwasher, refrigerator icemaker, and toilets. Look for cracks, bulges, or signs of corrosion. Replace rubber hoses with braided stainless steel lines for added durability.
- Water heater maintenance: Flush your water heater annually to remove sediment, which can extend its lifespan and prevent leaks. Inspect the pressure relief valve and the area around the tank for any signs of corrosion or leaks.
- Sump pump testing: If you have a sump pump in your basement or crawl space, test it regularly (e.g., quarterly) by pouring a bucket of water into the pit to ensure it activates properly. Consider a battery backup sump pump for power outages.
- Smart leak detectors: These devices can be placed near water-using appliances or in basements and will alert you via an app if they detect moisture. Some advanced systems can even shut off your main water supply automatically.
- Automatic shutoff valves: For major appliances like washing machines or your main water line, automatic shutoff valves can be installed to detect leaks and immediately cut off the water supply, preventing catastrophic damage.
For any concerns about your home’s plumbing system, from routine maintenance to unexpected leaks, it’s always wise to consult with professionals. Engaging reliable plumbing repair services can provide peace of mind, ensuring that your pipes, fixtures, and appliances are in optimal working order and less prone to causing water damage. Proactive plumbing care is an investment in your home’s long-term health and your family’s well-being.
Frequently Asked Questions
Understanding the common questions homeowners have about water damage and mold can help us reinforce key prevention strategies.
How quickly can mold develop after household water damage?
Mold spores are incredibly resilient and opportunistic. As we’ve emphasized, they can begin to germinate and develop into visible colonies in as little as 24 to 48 hours after water exposure. This rapid timeline is why immediate action to dry out affected areas is so critical. The presence of airborne spores combined with porous materials that absorb and retain moisture creates an ideal environment for this swift growth. Waiting even a few days can significantly increase the extent and cost of mold remediation.
What indoor humidity level prevents mold growth?
Controlling indoor humidity is one of the most effective ways to prevent mold. The EPA recommends keeping indoor relative humidity below 60 percent, with an ideal target range of 30 to 50 percent. When humidity levels consistently exceed 60%, surfaces can become damp, creating the perfect conditions for mold spores to activate and grow. Using a hygrometer to monitor humidity, along with dehumidifiers and proper ventilation, are essential practices for maintaining these optimal levels.
When is professional mold remediation necessary?
While homeowners can often tackle small mold issues themselves, there are clear indicators when professional mold remediation is necessary:
- Infestations exceeding 10 square feet: For areas larger than approximately 3 feet by 3 feet, professional expertise and equipment are typically required to ensure thorough and safe removal.
- Gray or black water intrusion: If the water damage originated from contaminated sources like sewage or floodwaters, professional remediation is essential due to severe health risks.
- Hidden structural contamination: If you suspect mold behind walls, under flooring, or within HVAC systems due to persistent musty odors or unexplained health symptoms, professionals can conduct proper investigations and safely remove the mold.
- Persistent musty odor: Even if visible mold is absent, a strong, lingering musty smell often indicates hidden mold growth that requires professional assessment.
- Health concerns: If family members are experiencing allergic reactions, asthma attacks, or other health issues that may be linked to mold exposure, it’s best to involve professionals who can ensure the environment is safe.
Professionals have the training, specialized equipment (like HEPA vacuums and air scrubbers), and containment procedures to safely and effectively remove mold and prevent its recurrence.
Conclusion
Preventing home water damage and mold is an ongoing commitment that safeguards both your property and your family’s health. We’ve seen that the fundamentals revolve around rigorous moisture control, from managing indoor humidity to ensuring proper exterior drainage. Routine home maintenance, such as cleaning gutters, inspecting plumbing, and testing sump pumps, serves as your first line of defense, catching potential issues before they escalate.
However, when water damage does occur, a rapid and informed response is paramount. Acting within the critical 24-48 hour window to dry affected areas can be the difference between a minor cleanup and extensive, costly mold remediation. Knowing when to tackle a small problem yourself and when to call in certified professionals is also a key part of this strategy.
By adopting these proactive measures and understanding the swift nature of mold growth, we can protect our homes from the insidious threats of water damage and mold, preserving long-term structural integrity and fostering a healthier living environment for years to come.