When you invest in a major remodel or addition, it makes sense to protect that investment. Pest control must be considered from the very beginning of a project, not as an afterthought. It is not difficult or costly to eliminate access points for pests and incorporate other preventive measures into your plans.
The Problem Starts Before the First Wall Comes Down
Before any demolition begins, you need a professional pest inspection. Not a quick visual scan, a thorough assessment of wall cavities, the foundation perimeter, subfloor spaces, and any areas that are about to be opened up.
Here’s why this step matters so much: pests don’t disappear when construction starts. They relocate. Subterranean termites living in the soil near your foundation, mice nesting inside a wall cavity, or carpenter ants in a damp floor joist, when the hammer comes through, those colonies scatter. If they haven’t been identified and treated beforehand, they move deeper into undisturbed sections of the home and you won’t find them again until you’re looking at serious structural damage.
A pre-demolition inspection also gives you a baseline. Your contractor needs to know if there’s existing damage behind a wall before they pull the drywall and find rotted framing. Discovering that mid-project adds cost and delays. Discovering it two weeks before demolition gives you time to treat and plan.
Termites alone cause over $5 billion in property damage annually in the United States (NPMA). For most homeowners, that statistic lands differently when they realize their renovation is about to disturb the soil and open the framing that termites use as a pathway.
Demolition Phase: Vibration, Displacement, and the Scatter Effect
The thud of heavy machinery, the staccato burst of a jackhammer firing up, the mosquito whine of a reciprocating saw, and sustained hammering. They’re all regular sounds on a construction project but they’re also the best way to effectively communicate with the pests that live in your building.
Earthbound vibrations and direct-to-structure vibrations all cause insects and rodents to flee the scene. So the colonies of termites, ants, and host of other pests that unknowingly share your shelter are sent scurrying. That’s the good news.
Everything else is the bad news.
Steeling yourself against all the others moving in might seem like a Sisyphean task but it’s absolutely necessary. Construction activity of all kinds disrupts the most solid principles of pest control, which are vigilant exclusion and a strongly maintained perimeter.
When taking your home or office back to the studs you’ve got an even bigger challenge facing you. The kind of challenge that demands an effective plan from the start.
The instinctive response for most colony insects and rodents is to move away from the disturbance. In a home under construction, “away from the disturbance” usually means into the quiet, finished parts of the house. A mouse that was living in the wall of the kitchen you’re gutting will relocate to the bedroom wing by the end of day one if there’s no barrier stopping it.
This is why vector control thinking has to be part of your demolition plan. Before walls come down, set up a temporary building envelope between the construction zone and your living quarters. Heavy-duty plastic sheeting secured around doorframes, temporary partition walls, and sealed utility openings all help contain the pest pressure to the zone where it originated. It won’t be perfect, but it dramatically reduces how far pests can travel during the disruption.
Rodent exclusion starts here too. Walk the perimeter of any area being opened up and identify every gap larger than a quarter inch. Mice can compress their bodies through openings roughly the size of a dime, so take the threshold seriously. Pack gaps around pipes and conduits with copper mesh before they’re sealed. Copper mesh is rust-proof and rodents can’t gnaw through it, unlike foam-only solutions that provide almost no physical resistance.
Framing and Rough-in Phase: The Window That Closes Permanently
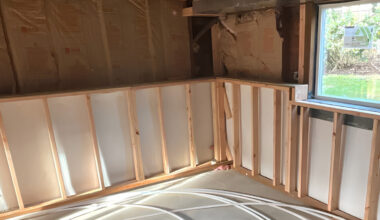
Once demolition is over and you move on to the framing phase, this is your opportunity to pest-proof your house. This is when your home is in its most structurally open form that you’ll see during the entirety of the project. Studs are exposed. Subfloor may be visible. Plumbing lines are being rerouted, electrical conduits are being run, and HVAC ducts are being positioned. Every one of those penetrations creates a gap in the building envelope.
This is the most important phase for pest-proofing, and it’s also the most time-limited. Once the drywall goes up, whatever’s in the walls stays in the walls. Forever. A five-minute hole around a pipe becomes inaccessible the second the wall closes.
Every utility penetration, HVAC ducts, plumbing supply and drain lines, gas lines, conduit bundles, needs to be sealed before the framing is covered. Copper mesh to block the opening and fire-rated caulk or polyurethane sealant gets you mechanical and chemical resistance. Polyurethane sealant stays flexible through structural shifts and temperature changes, which are important because tiny gaps stay tiny in new construction and tend to grow large in old construction.
The point at which wood framing meets the concrete foundation is the most vulnerable part of an entire build. It’s also the preferred entry point for wood-destroying organisms, specifically subterranean termites, as they go from soil to source. Rough-in is the only time that area is exposed and visible, making it the optimal time to apply a preventative termiticide. This isn’t something you plan for the end of the project.
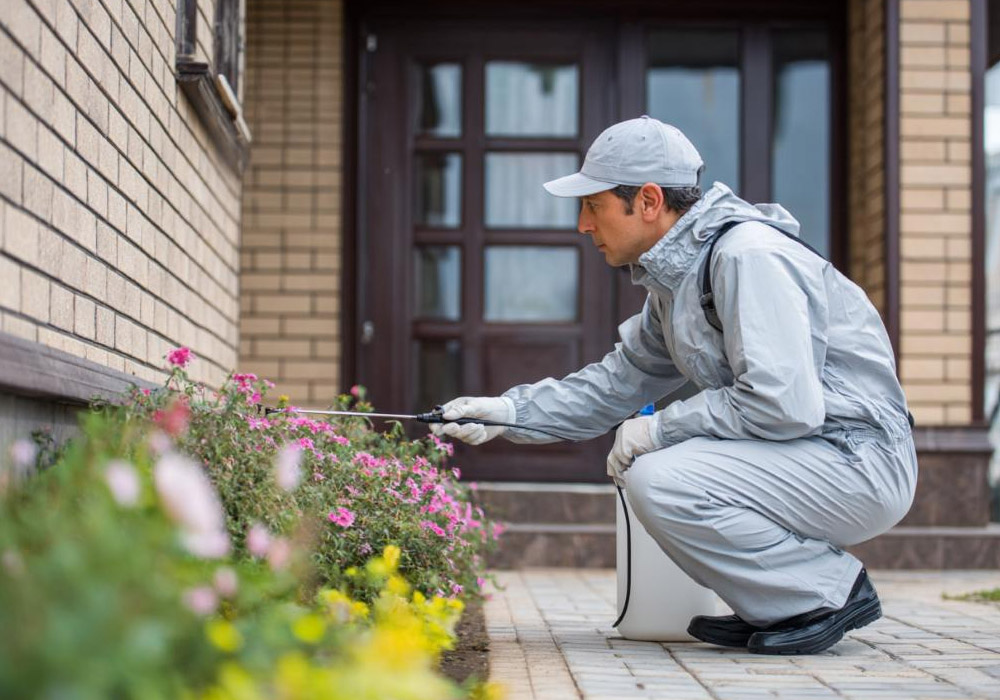
Homeowners also need to schedule a visit from their pest control services in O’Fallon to apply preventative treatments, including inspecting the exposed structural elements before the drywall traps them behind sheetrock. A pro can apply a soil treatment around the foundation, verify whether there is any existing termite activity in the exposed framing, and install monitoring stations in areas that will still be exposed for easy access post-construction. Having a pest control pro on-site at this time instead of post-project is the difference between prevention and remediation.
If you have a brick veneer home, you may already know that weep holes are located at the base of exterior walls to allow water to drain from the wall cavity. This helps prevent moisture-related issues as moisture can escape instead of becoming trapped within your walls. However, weep holes are also a popular entry point for pests. As you begin a major renovation project you may block weep holes as you work near the exterior of your home. To prevent pests from entering in the meantime, cover weep holes with screening. This will allow air and water to continue to flow in and out of the wall cavity as intended.
Soil, Grade, and Exterior Landscaping Decisions During Excavation
If your renovation includes any foundation work, addition footings, or substantial exterior excavation, the soil management during that process directly impacts your termite risk.
Subterranean termite colonies live in the soil and need moisture and soil contact to function. When excavation brings fresh soil to the surface, disturbs existing colonies, or creates conditions where soil ends up piled against the wood framing, it establishes a direct bridge between the ground and the structure. That bridge is exactly what termites use.
A few rules for soil management around active excavation: keep the soil grade sloping away from the foundation, not toward it. Don’t let excavated soil or construction-phase mulch accumulate against wooden siding or the sill plate. After excavation is complete, make sure the finished grade doesn’t create any wood-to-soil contact points that weren’t there before.
Integrated Pest Management, the practice of combining physical barriers, habitat modification, and targeted treatments rather than relying on any single control method, applies directly here. Managing the grade is habitat modification. Sealing penetrations is physical exclusion. A professional termiticide treatment is the targeted application. All three working together, applied at the right phases of construction, is what actually keeps termites out of a remodeled home.
Managing Moisture and Cellulose Debris
Two situations lend pest pressure on a renovation site a helping hand above everything else: standing moisture and accumulated organic debris.
Construction waste is cellulose-rich. Scrap lumber, wooden shims, wood lath, cardboard and paper packaging from fixtures and appliances and windows, drywall and gypsum board offcuts, all of it adds up in the blink of an eye if you’re not being cognizant of the fact that you’re generating bug food and haven’t developed a waste management plan starting on day one. Termites, carpenter ants, and other cellulose foragers do not need an engraved invitation and an open bar. Just leaving that scrap lumber pile against the foundation for a few days will be more than enough to make sure you have guests, likely unwanted ones.
The job site clean rule is simple: nothing cellulose-based stays on-site overnight. Get rid of those scrap wood piles every single day by throwing them into the dumpster. Cardboard and paper material must be broken down and disposed of. Keep the foundation perimeter as clean as a whistle. This is a required conversation you need to have with your general contractor before work properly starts because he probably does not work to those standards without some prompting on your end about the issue of pests.
Moisture is the second biggest problem. Wet framing becomes an irresistible area for wood-boring beetles and sets you up with a mold problem which will then attract all kinds of other undesirables. Is the framing getting wet? Well, then make sure it dries before you trap it behind your walls. Use fans and dehumidifiers after the rain or humidity rolls in unexpectedly. Check with a moisture meter, is the water content down to an acceptable level? Don’t close the walls until it is.
Over open sections of the roof or exposed framing during extended work, temporary tarps are not optional, they’re structural protection. A week of rain soaking into a newly framed addition creates problems that won’t show up for months, at which point the drywall is up and the insulation is in and you’re tearing it all back out.
Finishing Phase: Don’t Relax Before the Work is Done
As the project progresses to the final stage, painting, flooring, trim, and fixture installation, people tend to become less concerned about pests. The walls are closed, the roof is on, and the site appears secure.
At that time, many people skip the final walk-around.
Before the flooring is installed, it’s easy for an inspector to check that all openings through the subfloor, usually plumbing, ductwork, and electric, are well sealed. Before baseboard trim is nailed in place, the trim carpenter can make certain that the gap behind the sill plate has been addressed. But once a cabinet or a bookcase is drawn tight against a wall, whatever is hidden in that wall cavity is permanently obscured.
A final inspection by a pest professional at this point, before the punch list work is done but after the major systems are in place, can easily detect anything that was overlooked or that developed during the construction process. And it’s a lot cheaper to get at the problems when the inspector can simply point to what needs attention and a trade can fix it in half an hour.
Renovation is Your Best Opportunity For a Pest-Free Home
Most homes only get fully opened up once, maybe twice, in their entire lifespan. A major renovation is genuinely the best chance you’ll ever have to address pest vulnerabilities that are normally hidden behind finished walls and under sealed floors. Treating that window as a pest-proofing opportunity rather than a pest-proofing liability changes the whole equation. The cost of preventative treatments during construction is a fraction of what remediation costs after the walls are closed, and the protection it buys lasts for decades.