How to Pair Motion Lighting With Security Camera Alerts
A porch light comes on, yet the camera alert reaches your phone after the visitor has stepped out of view. On another night, a branch moves in the wind and both devices react to nothing that needs attention. These are often treated as one automation problem, but lighting, recording, and notifications do different jobs.
The light makes a dark area easier to see. The camera detects or records activity. The alert asks someone to look. A solid routine gives each part of the system its own trigger, timing, and test. That distinction also keeps a brighter yard from becoming the default answer to missed events or noisy alerts.
This guide works for separate devices as well as an integrated motion sensor light camera. Cross-device routines depend on the exact ecosystem, models, app, and firmware, so verify compatibility before planning a camera-to-light trigger.
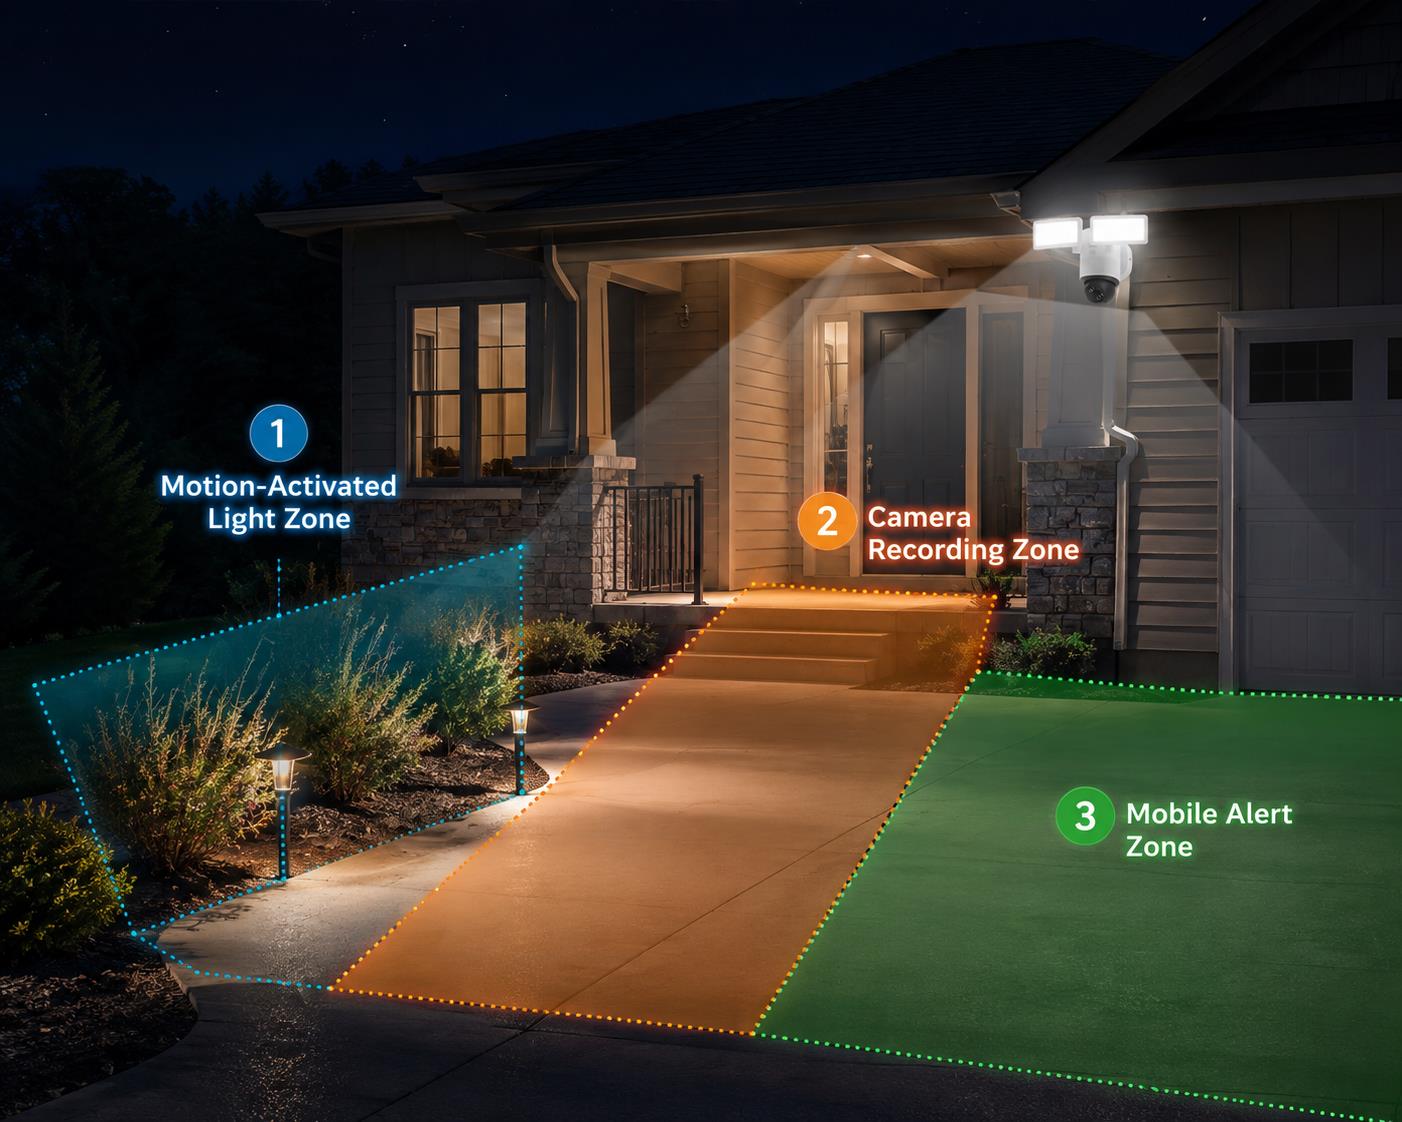
Alt: Night‑time home diagram: separate zones for motion light, camera recording and mobile alert
File name: motion-light-camera-alert-trigger-chain.png
Map Motion Zones Before Automating
Stand at the camera location during the day and divide the view by purpose. The front walk, porch steps, side gate, and near end of a driveway may deserve attention. A public sidewalk, neighboring property, or the far lane of a street does not need the same response.
Separate the Three Response Areas
Do the same exercise from the light’s point of view. Its useful area may be wider than the camera’s detection zone. A light can cover the steps while the camera watches the approach, provided the beam does not point into neighboring windows or wash across the lens.
Sketch out a quick zone map before you dive into sensitivity settings:
| Area | Light response | Camera response | Alert response |
| Front steps | Illuminate the walking surface | Record the approach and landing | Notify for activity near the entrance |
| Driveway near the garage | Light the parking and door area | Record motion within the property line | Notify when the event meets the chosen detection rule |
| Public sidewalk | Avoid unnecessary spills where possible | Exclude or reduce sensitivity if supported | Suppress routine passersby where supported |
| Trees, flags, and pet routes | Keep outside the main trigger area when practical | Review before changing settings | Adjust only after the cause is visible in footage |
Walk the Boundaries at Night
Once you’ve mapped out rough zones, walk the full route at night to fine‑tune them. The same rectangle in two apps may not produce identical coverage because sensor position, viewing angle, range, and detection method differ.
Walk the route at night once the rough zones are set. Approach from each likely direction at a normal pace, noting where the light turns on, where recording begins, and when the alert appears. These observations become the baseline for later changes.
Set Timing and Brightness Around the Space
Timing covers when illumination begins, how long it stays on, and when the phone notification arrives. These moments may not line up because separate devices detect independently, while network and phone conditions can affect notification delivery. Avoid assuming a fixed delay.
Tune Duration and Brightness Together
Set the light duration long enough for someone to cross the active area, but not so long that every brief event leaves the yard lit. A porch landing may need a different duration from a long driveway. Change one setting and repeat the same walk.
Brightness deserves the same restraint. Raise it until faces, steps, and obstacles are readable in saved footage, then stop. Maximum output can create glare on pale siding, wet pavement, vehicle plates, glass doors, or nearby walls. It can also leave the background darker after the camera adjusts to a bright foreground. The most useful setting is usually the lowest brightness that delivers a usable view across the area you care about.
Check the beam from the property edge, the nearest bedroom, and the recorded frame. Tilt it down or narrow its spread if it reaches beyond the intended area. Watch for a bright edge or reflection when the camera sits close to the fixture.
Use Schedules With a Defined Purpose
A schedule can keep ordinary evening activity from triggering the same response as late-night movement. That might mean ambient lighting during expected arrival hours and motion activation later, if the equipment supports both modes. Treat schedules as local settings, not universal automation: sunset rules, time zones, daylight-saving changes, and offline behavior vary by device.
If these controls justify replacing hardware, eufy’s wireless floodlight camera range offers one place to compare mounting, power, lighting, and storage. Verify the exact model before choosing.
Reduce False Alerts Without Creating Blind Spots
False alerts need evidence. Lowering sensitivity may quiet the phone but also shorten useful detection. Open several unwanted events and identify what moved, where it entered the frame, and whether the light changed the image.
Identify the Pattern Before Changing Sensitivity
A practical troubleshooting path looks like this:
- Find the repeated source. Look for a branch, flag, insect close to the lens, pet route, passing headlights, reflective surface, or traffic at the edge of the frame.
- Change the physical scene when possible. Trim vegetation, move a hanging decoration, clean the lens, or redirect the light away from glass and glossy surfaces.
- Refine the zone. Exclude the repeated source or pull the active boundary farther inside the property where the device allows it.
- Adjust sensitivity by one step. Retest the intended approach after each change, especially at the far edge and from an angle.
- Review alert filters separately. Person, vehicle, animal, or other classifications can be useful when supported, but they should be checked against saved events rather than treated as perfect labels.
Match the Fix to the Trigger
An insect near the lens may appear much larger than it is, while vehicle headlights can sweep over a wall without the vehicle entering the useful area. Compare frames immediately before and after illumination to see whether glare, a web, or a reflective object becomes prominent.
Match the fix to the source. If an unwanted trigger comes from the light’s detector, changing camera notifications will not stop the light. Adjusting the light may not change camera recording either.
Test the Chain in Steps
Testing everything at once hides the source of a failure. A missing alert could come from detection rules, connectivity, phone permissions, or notification filtering. Testing one stage at a time helps pinpoint exactly where the chain breaks down.
Test Each Stage on Its Own
Begin with the light alone. Enter the zone from each likely direction, wait for it to switch off, and repeat the route to check how continued motion affects the duration.
Test the camera without relying on the phone alert. Create a controlled event and verify that the saved recording includes the approach, not only the moment nearest the camera. Review both day and night results.
For notifications, lock the phone and move off home Wi-Fi if practical before creating another event. Compare the displayed event time with the notification time. The difference is an observation, not a guaranteed latency figure. If delivery varies, check phone permissions, battery-saving settings, connectivity, and event rules.
Run the Whole Routine
Finish with the full routine:
- Walk the route while the light and camera are in their normal modes.
- Confirm which device reacted first and whether the recording shows the scene before and after illumination.
- Repeat from the edge of the intended zone and from outside it.
- Try a harmless nuisance source already seen at the property, such as normal sidewalk traffic or a moving branch.
- Recheck the routine after a schedule change, firmware update, power interruption, or major seasonal change in vegetation.
Use a unique password, enable multifactor authentication when available, install updates, and review camera access. The Federal Trade Commission recommends these steps for internet-connected home security cameras. [Source: Federal Trade Commission, How To Secure Your Home Security Cameras]
Match an Integrated Camera to the Routine
Separate devices offer flexibility, but coordination depends on confirmed support between the light, camera, platform, and trigger. An integrated unit removes part of that question because the light and camera share documented controls, though it still needs the same zone, glare, timing, and notification tests.
Use One Device Only When It Fits the Scene
The eufy Floodlight Camera E340 is a practical fit for this kind of lighting-and-alert routine. Its smart illumination peaks at 2,000 lumens light and 360° camera coverage, and you can set it for motion‑activated lighting. It’s an all‑in‑one unit, so you don’t have to coordinate separate devices — but it still follows the same zone, glare, timing, and notification testing rules above.
For driveways or side entrances, set brightness for clear, usable footage instead of cranking it to max. Walk the full route, watch how the scene shifts when the light kicks in, and test alerts separately.
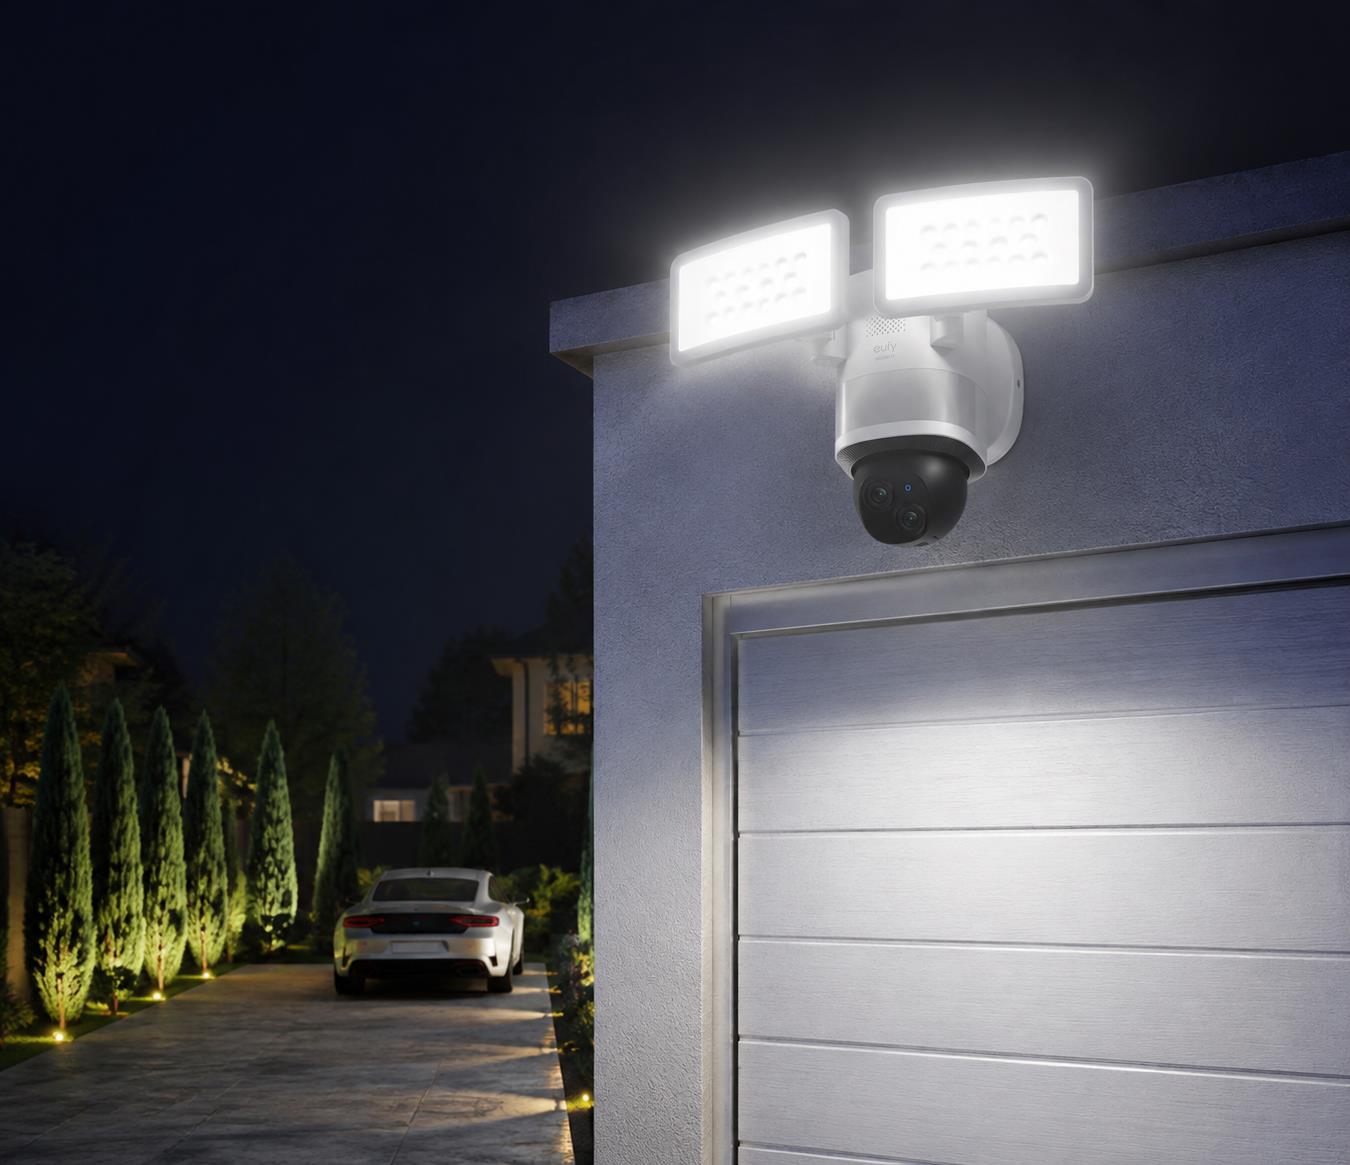
Alt: eufy Floodlight Camera E340 illuminating a driveway
File name: eufy-floodlight-camera-e340-driveway-routine.jpg
Conclusion
Good coordination starts by treating illumination, recording, and alerts as separate decisions. Map each zone, set enough light for a readable scene, observe timing instead of assuming instant delivery, and trace nuisance events back to the device that actually triggered.
Test the light, camera, and phone on their own before judging the full routine. This approach works for both setups: two separate compatible devices, or a single integrated floodlight camera, and it makes future adjustments easier when weather, vegetation, schedules, or household routines change.