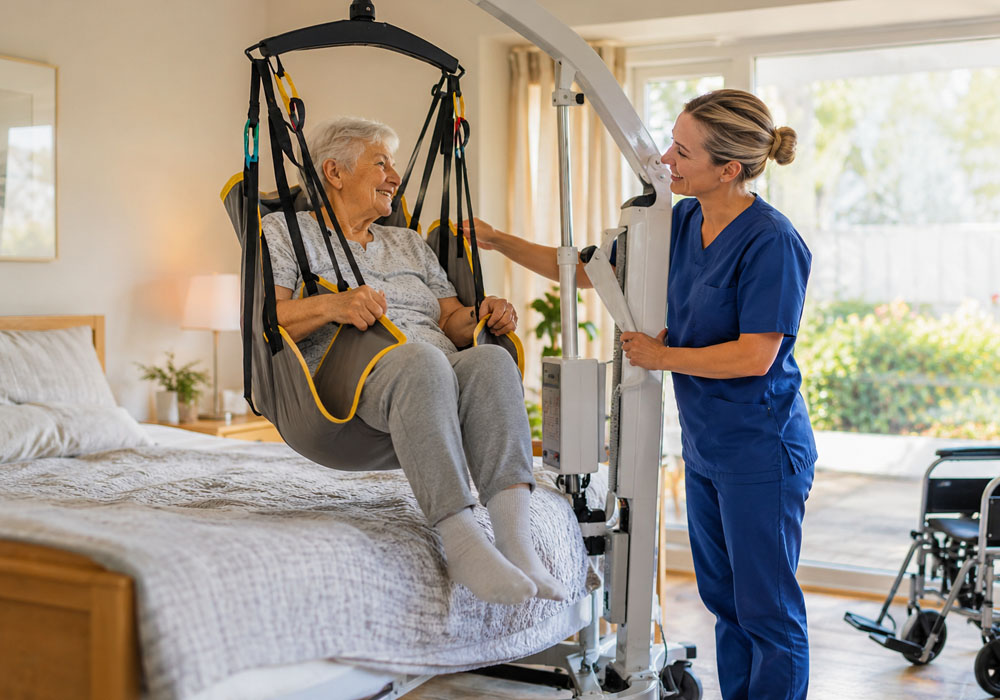
Helping a spouse or parent move from bed to a wheelchair can become difficult as their support needs change. It is worth discussing transfer equipment before the family reaches the point of improvising a lift or struggling through each move. Choosing a patient lift means thinking about the person receiving care, the caregiver and the space they share. A model that looks convenient in a listing still needs to suit the actual transfers that will happen at home.
Why manual transfers stop being an option
Don’t use a single weight figure from an online guide to decide whether a manual transfer is safe. Ask the care team to assess the person’s ability to participate, the assistance required and the caregiver’s capabilities. The outcome should be a transfer plan that identifies suitable equipment and explains how it is to be used.
If a person cannot reliably support their own weight during a transfer, talk that through with the care team rather than relying on a familiar pivot technique. Describe what happens on a difficult day, not just a successful one. A plan needs to account for the assistance actually required, including whether the household can provide the trained help needed for the selected equipment.
Patient safety belongs in the same conversation as caregiver strain. The FDA notes that patient lifts can reduce injury risks when used properly, but incorrect use can cause serious falls. A lift does not remove every risk by itself. Equipment selection, the sling, training and the transfer environment all need to be considered together.
Floor lifts vs. ceiling lifts
There are two main types of patient lifts: floor lifts (such as a Hoyer lift) and overhead ceiling track lifts.
An overhead ceiling-track lift may be worth considering when the room and installation arrangements allow it. Compare the proposed coverage with the transfers needed, rather than assuming a track can serve every position in the home. Ask about installation requirements, cost and any restrictions in a rented property. It may avoid maneuvering a floor base during the transfer, but the caregiver still needs training and a workable plan for using the system.
A floor lift avoids the need for a ceiling track, but it still needs enough room to work. Check access around the bed, chair and bathroom, and have the supplier demonstrate how the model is moved and positioned. Don’t assume that moving between rooms always requires separate lifts, or that a portable base will fit everywhere. In a two-story home, discuss transfers on each floor separately. The decision should follow the layout and care plan rather than a rule about how many lifts every household needs.
Weight capacity is the first decision, not the last
Before comparing features, confirm the person’s weight and check the stated limits for both the lift and the sling. The FDA advises that neither limit should be exceeded. Don’t invent a separate capacity rule from a general example or assume that a larger rating makes every other aspect suitable. Have the supplier and care team confirm the proposed combination, including the fit and the transfers it is intended to support.
Discuss any expected changes in care needs as part of that choice. They may affect which equipment is practical over time, but capacity should not be selected in isolation. When comparing a hoyer lift for sale, request the model’s capacity, compatible sling information and warranty terms before deciding. Treat a listing as the start of the conversation, not confirmation that the equipment is suitable for your family.
Manual hydraulic or electric actuator – which one fits your household
Floor lifts raise and lower patients using one of two mechanisms.
Manual hydraulic lifts use a hand pump to raise the person, with lowering controlled according to the model’s instructions. Ask for a demonstration so the caregiver can understand the effort and movement involved before purchasing. A manual model does not require a powered lifting actuator, but that does not make it maintenance-free or automatically easy to operate. Consider the frequency of transfers and who will perform them. A mechanism that seems manageable during a brief demonstration may not suit every caregiver or daily routine.
Powered lifts use a motor to raise and lower the person, typically with a rechargeable battery. They can reduce the pumping effort, but someone still has to position the equipment and carry out the transfer correctly. Compare the actual price, charging arrangements and service requirements rather than assuming an electric model will pay for itself. Ask the caregiver to try the controls during a demonstration, and have the care team help judge whether the proposed model suits the person being transferred.
Slings: the decision that actually determines patient safety
The lift body is only part of the purchase. The sling supports the person during the transfer and deserves the same careful attention as the lifting mechanism.
Don’t select a sling by its name alone. General-transfer, split-leg, amputee, toileting and bathing designs need to be assessed for the individual and the task. Ask the care team which support and fit are needed, and have the supplier identify the approved options for the lift. A description such as “universal” is not permission to use a sling with any model. The FDA advises matching the sling to the specific lift and the patient’s weight, using a sling approved by the lift manufacturer.
Confirm sling compatibility before buying the lift itself. Not every sling fits every lift’s spreader bar or hook configuration, so check the approved combination rather than assuming similar-looking attachments will work.
Safety features that separate a real lift from a risk
Ask the supplier to demonstrate the model’s safety features and emergency lowering procedure. Check how the sling attaches and what the instructions say about positioning and casters at each stage. Do not assume that locking the lift’s own wheels is always the correct transfer procedure, or add straps that are not specified for the system. The caregiver should understand the actual equipment in front of them, rather than relying on a generic checklist that may describe another model.
For a powered model, ask what to do if power is lost during a transfer and how to check readiness before starting. Have the emergency procedure explained during training. Don’t assume that every lift has a backup battery or that an unfamiliar lowering control will be obvious under pressure.
Measuring your home before you measure the specs
While a lift can look like a perfect fit on paper, real life has a way of introducing complications.
Measure doorway widths against the lift’s base width – many floor lifts have a wider stance than people expect, and hallway or bathroom doorways are common bottlenecks. Check how the casters handle carpet or rugs; a lift that rolls smoothly on hardwood can drag or catch on thick carpet, turning a simple transfer into a wrestling match. Confirm bed-to-chair clearance in the actual room where transfers will happen most often, not just in the room that seems biggest.
Storage matters too. A lift that lives in the middle of the bedroom because there’s nowhere else to put it becomes an obstacle itself. Plan a spot that’s close enough to be practical but doesn’t turn into a tripping hazard.
The costs that show up after the purchase
The purchase price is only part of the budget. Ask how the sling should be inspected, washed and replaced, and what replacements cost for the approved model. Follow the inspection instructions rather than deciding that a sling is sound simply because it is fairly new. The FDA advises against using a sling that shows damage or wear.
Ask for the manufacturer’s maintenance schedule for the hydraulic system or powered mechanism. Confirm who can service it and what the battery-care instructions require. Don’t assume that topping up fluid or replacing a part yourself is appropriate for the model.
Check the availability of approved replacement parts and service before purchase. Ask what support is offered if the lift cannot be used, and discuss a transfer contingency with the care team. A household should not have to invent an alternative in the middle of an equipment problem.
Training matters as much as the equipment
Training should cover the actual lift and sling the household will use. Ask for instruction on attaching and checking the sling, positioning the equipment, operating the controls and recognizing when something is wrong. Each person expected to assist should understand their role and the help required. If a movement feels forced or the sling does not appear correctly positioned, stop and follow the trained procedure rather than improvising. Keep the instructions accessible so that uncertainty leads to a check, not a guess.
Make the person’s comfort part of that training too. Ask how to explain the transfer and respond if they become distressed. Familiarity can help the household use the equipment more confidently, but it should never be treated as a reason to skip checks or continue with an uncertain setup.
Buying smart: what to confirm before you spend money
Before finalizing a purchase, confirm service support, warranty terms and sling availability for the exact model. Ask what documentation supports its intended use and have any unfamiliar regulatory claims checked. Read the return policy before relying on a home trial. With used equipment, arrange an appropriate condition and service-history assessment rather than judging wear from a photograph. Price and appearance cannot establish whether the equipment is ready for your household’s transfers.
If you hope to use insurance or another funding route, confirm eligibility, documentation and supplier requirements directly with the plan before purchasing. Ask about the particular lift and accessories being considered. Don’t build the budget around an assumed reimbursement that has not been confirmed for your circumstances.
A patient lift is a safety system, not a single appliance. The sling, the base, the battery, the training, and the room it operates in all have to work together, and skipping any one of them undermines the rest. Get the capacity right, get the sling right, and measure the home before the equipment shows up – the rest gets a lot easier once those three things are settled.