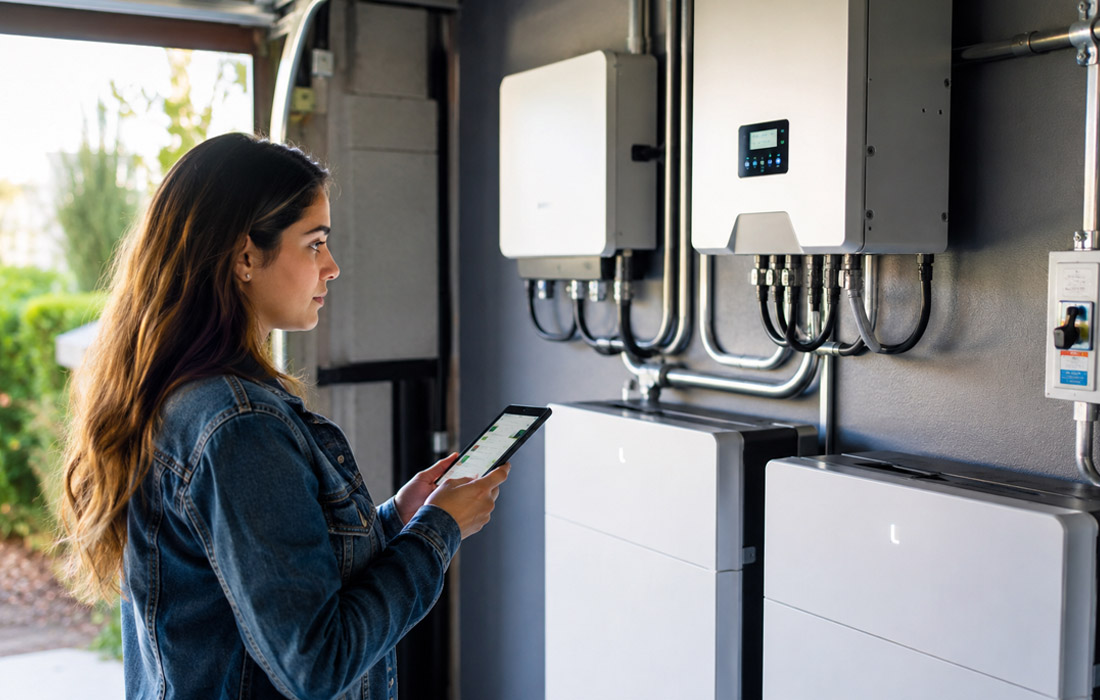
Most homeowners get this backwards. They pick a battery based on budget first and figure out whether it covers their house second. That’s how you end up spending $15,000 on a system that dies after running your fridge and a few lights for eight hours. Battery sizing is a decision you want to make once, correctly, before any equipment ships.
The good news is the process isn’t complicated. It comes down to three things: how much power your home actually pulls, which circuits you genuinely need covered, and how long you expect to run on stored energy alone. Walk through those three questions honestly and the right battery size becomes obvious.
Why Outages Last Longer Than You Think
The instinct most homeowners have is to plan for a two-hour outage, because that’s what most outages feel like. The data tells a different story. In 2024, the average PG&E customer in California experienced about 276 minutes of outage time per year, according to PG&E’s own Electric Reliability Report, and that average hides the multiday events tied to wildfires and severe weather, which knock out power for thousands of households at once.
Planning for a two-hour gap is planning to fail. A meaningful battery backup needs to carry your home through at least one overnight cycle, and ideally 24 to 48 hours for a whole-house setup. That time horizon is what drives your capacity math.
Step One: Build Your Load List Using the Circuit Priority Triage Method
Before you look at a single battery spec sheet, sit down with your electrical panel and sort your circuits into three tiers. This is the Circuit Priority Triage, and it’s the foundation everything else builds on.
- Tier 1: Non-negotiable loads. These are the circuits you run no matter what. Refrigerator, medical equipment, well pump if you have one, a few lights, phone charging. These are typically 500 to 1,500 watts running intermittently.
- Tier 2: Comfort loads. HVAC tops this list. A central air conditioner pulls 3,000 to 5,000 watts at startup and around 1,500 to 2,500 watts running. A heat pump runs a bit leaner but still adds real load. You probably want this tier covered in summer, even if it means sizing up.
- Tier 3: Everything else. Electric dryer, hot tub, EV charger. These are legitimate wants, but they’re not why you buy a battery. Size for Tier 1 first, build toward Tier 2, treat Tier 3 as a bonus your system earns at a larger capacity.
Once you have your tiers mapped, add up the wattage for each tier. Multiply that by the number of hours you want to run it. That gives you your daily energy need in watt-hours. Divide by 1,000 to convert to kilowatt-hours (kWh), and you have your minimum battery size before any efficiency buffer.
Running the Numbers: A Concrete Scenario
Here’s a real example worth working through. Say your Tier 1 loads total 900 watts. Your Tier 2 HVAC system draws about 1,800 watts while running. You want 24 hours of coverage.
900W x 24 hours = 21,600 Wh for Tier 1. Add 1,800W x 8 hours of estimated runtime for HVAC = 14,400 Wh. Combined: 36,000 Wh, or 36 kWh. Add a 20% efficiency buffer, and you’re looking at roughly 43 kWh of usable battery capacity. That’s in the territory of two to three standard home battery units stacked together, not a single unit.
This is why the “just get one battery” answer rarely works for whole-house coverage. One 10 to 13 kWh unit gets you through Tier 1 for maybe 14 hours. That’s a good start, but it’s not a whole-house solution, and you should know that before you buy.
Battery Chemistry and What the Specs Actually Mean
The two chemistries you’ll encounter for residential storage are lithium iron phosphate (LFP) and nickel manganese cobalt (NMC). LFP runs cooler, degrades more slowly over hundreds of charge cycles, and is the chemistry most major home battery products have shifted toward. NMC offers slightly higher energy density, meaning a physically smaller pack, but it has a shorter cycle life under heavy daily use.
| Spec | What It Means for You | What to Look For
|
| Usable Capacity (kWh) | The energy you can actually draw | Higher = longer coverage per charge |
| Continuous Power (kW) | How many watts it can push at once | Must exceed your peak simultaneous load |
| Depth of Discharge (DoD) | What % of capacity you can safely use | 80% DoD minimum; 100% is best-in-class |
| Round-Trip Efficiency | Energy lost in the charge/discharge cycle | 90%+ means less waste |
| Warranty Cycles | How many full charges before degradation | 3,000+ cycles for daily solar use |
Pay close attention to continuous power rating. A battery with 13 kWh of capacity but only a 5 kW continuous power output can’t start a large air conditioner, even though it has plenty of stored energy. Startup surge (sometimes called inrush current) for a central AC unit can spike to three or four times its running wattage for a fraction of a second. Your battery’s peak power rating needs to handle that spike, or your AC simply won’t turn on.
How Solar Changes the Sizing Equation
If you already have solar panels, or you’re installing them alongside a battery, your target capacity shifts. You don’t need the battery to carry your home indefinitely on its own. You need it to bridge the overnight gap between sunset and your panels generating enough power the next morning, while also absorbing any midday surplus your grid won’t pay you full price for.
That changes the math meaningfully. A 10-panel system in Southern California might generate 40 to 50 kWh on a clear summer day. If your daily usage is 30 kWh, you have surplus to store. Your battery becomes a buffer, not a standalone generator. In that scenario, a single well-matched 10 to 13 kWh unit might genuinely be enough, assuming your critical loads are modest and your solar system is sized correctly.
The connection between your panels and your battery also matters for incentive eligibility. California’s revised net metering policy makes pairing solar with storage significantly more attractive financially. Homeowners exploring solar battery storage in Moorpark will find that the right sizing conversation starts with a full site assessment, not a catalog.
The Residential Storage Surge Is Real
You’re not early to this. According to the U.S. Energy Information Administration’s January 2025 data, cumulative utility-scale battery storage capacity in the United States exceeded 26 gigawatts in 2024, with generators adding 10.4 GW of new battery storage capacity that year, the second-largest generating capacity addition after solar. Residential storage is tracking the same trajectory, and the EIA’s 2025 report notes battery storage is now the fastest-growing category after solar in terms of new U.S. capacity additions. Prices have dropped significantly over the past five years as manufacturing has scaled, and that trend is continuing.
Industry observers have noted the shift clearly. “After another year of record deployment, energy storage is solidifying its place as a leading solution for strengthening American energy security and grid reliability,” the American Clean Power Association noted in early 2025.
“The economics of pairing solar with storage have never been stronger for homeowners. The battery is no longer the afterthought. For many customers, it’s the reason they go solar at all.”-Consensus view from residential solar industry analysts following California’s NEM 3.0 policy shift, 2024
Practical Sizing Checklist Before You Call an Installer
- Pull your last 12 months of utility bills and note your monthly kWh usage. Average it.
- Walk your panel box and label every circuit by tier (non-negotiable, comfort, or optional).
- Estimate startup wattage for any motor-driven appliances on your critical circuits.
- Decide your minimum outage coverage target (12 hours, 24 hours, or 48 hours).
- Run your load math using the scenario format above, then add 20% for efficiency losses.
- Confirm the battery’s continuous and peak power ratings against your largest single load.
- Ask your installer whether stacking units (adding a second or third battery) is cheaper than upsizing the inverter.
You’ll walk into that installer conversation knowing exactly what you need, which means you won’t get talked into something undersized or oversold on capacity you’ll never use. That clarity alone is worth the hour it takes to do the math. Getting battery sizing right the first time means no regrets the morning after the next grid event. Your home runs, your food stays cold, and you wake up to panels already recharging your system. That’s the whole point.