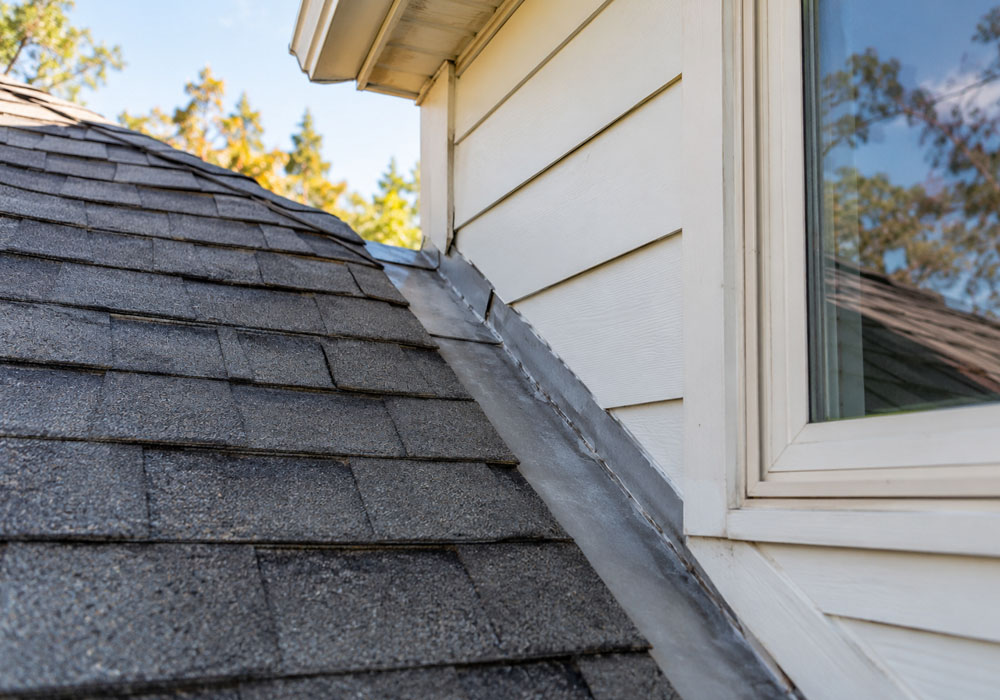
Some of the most complicated parts of a roof are not found in the middle of a broad shingle field. They appear where roofing meets something else: a wall, chimney, dormer, siding section, or another change in the shape of the building.
These intersections interrupt the simple downhill path that rainwater normally follows. Instead of moving straight toward the gutter, water must be directed around a vertical surface without slipping behind shingles, siding, or trim.
That job depends heavily on flashing and the way several materials overlap. If one piece is missing, installed in the wrong order, or covered by an improvised repair, moisture can reach places that are difficult to see from outside.
Understanding these transitions can help homeowners recognize why a leak near a wall may require more investigation than replacing a nearby shingle.
Why Shingles Cannot Seal a Roof Against a Wall by Themselves
Shingles are designed primarily to shed water down a sloped roof.
They work through overlapping courses. Water travels over the surface and moves from one shingle to the next until it reaches the roof edge.
A vertical wall interrupts that pattern.
If shingles simply stop against siding or another wall covering, water can enter the narrow joint between the two surfaces.
Trying to seal that joint with a continuous bead of caulk does not recreate the normal layered drainage system of the roof.
A better approach uses flashing to move water back onto the roofing surface before it can reach the roof deck or wall assembly.
Step Flashing Works One Course at a Time
Where a sloped roof runs alongside a wall, step flashing is commonly used to protect the intersection.
Instead of one long piece of metal covering the entire joint, individual flashing pieces are layered with the shingles.
Each piece works with one portion of the roof covering.
The arrangement creates a repeating sequence in which water encounters flashing and is redirected onto the shingle below.
This overlapping method matters because roofing materials move.
Temperature changes can cause materials to expand and contract. A long rigid piece may behave differently from a system that is integrated course by course with the shingles.
Why the Overlap Matters
The position of each piece determines where water goes next.
If a flashing section does not extend far enough, overlaps incorrectly, or becomes damaged, water may find a route behind the roofing.
From there, it can reach the roof deck, wall sheathing, insulation, or interior finishes.
This is why small details at the roof-to-wall joint can influence areas much larger than the flashing itself.
Siding and Flashing Need to Work Together
Flashing cannot perform properly if surrounding wall materials interfere with its drainage path.
Siding installed too tightly against a roof may trap moisture or make inspection difficult.
Certain wall coverings also need enough separation from the roofing surface to avoid repeated wetting and debris buildup.
The exact detail depends on the wall and roofing materials, but the basic principle remains the same: water should be able to travel over the flashing and return to the exterior without becoming trapped.
Problems can occur when later repairs cover the original relationship between the siding and flashing.
For example, sealant may be applied across an area where water was meant to drain freely. Trim may also be added without accounting for the flashing beneath it.
The visible finish can look neat while the drainage path behind it becomes less reliable.
Kick-Out Flashing Handles the Bottom of the Wall
One of the most important details appears where the roof-to-wall intersection ends.
Water traveling down step flashing eventually reaches the bottom of the roof slope. At that point, it needs to be directed away from the wall and toward the gutter.
Kick-out flashing helps perform that transition.
The small piece directs runoff outward so it does not continue behind siding or flow along the wall surface.
Without a suitable transition, repeated runoff can wet exterior finishes and wall components below.
Why This Area Can Cause Damage Beyond the Roof
A roof-to-wall leak does not always stay in the roofing assembly.
If water reaches the wall, it may travel behind siding and affect sheathing or other materials farther down.
That can make the original source difficult to identify.
A stain inside the house might appear several feet away from the visible roof intersection because water can follow framing or other surfaces before becoming noticeable.
For this reason, the bottom of a roof-to-wall transition deserves just as much attention as the flashing higher on the slope.
Caulk Should Not Be the Main Water-Control System
Sealants have legitimate uses in roofing, but they should not be expected to replace correctly layered materials.
A thick bead of caulk may appear reassuring because it visibly closes a joint.
The problem is that exposed sealant ages, moves, and can separate from surrounding materials.
If the roof-to-wall detail depends entirely on that bead remaining intact, the repair may become vulnerable as soon as the sealant deteriorates.
A properly detailed intersection should direct water outward through overlapping components.
Sealant may support that system in certain places, but it should not become the only thing standing between rainwater and the wall cavity.
Chimneys Create Several Roof-to-Wall Transitions at Once
Chimneys are especially interesting because they combine several different water-management conditions in one small area.
The sides may require step flashing, while the upper side of the chimney must deal with water flowing directly toward the obstruction.
The lower side has another transition where water continues toward the roof edge.
This makes chimney flashing more complicated than simply sealing around the perimeter.
Water Can Collect on the Upslope Side
The upper side of a chimney interrupts runoff coming from above.
Depending on the size and roof configuration, water may be redirected around the chimney using specialized flashing details.
If the upper transition is poorly designed or deteriorated, water can remain concentrated against the chimney.
Debris may also collect in that area.
A leak that appears near a chimney therefore may not come from the most visible side.
The entire perimeter needs to be considered.
Dormers Combine Roof and Wall Drainage
Dormers create similar challenges.
Their side walls meet the main roof, while their own roofs introduce additional valleys, eaves, or flashing points.
Water moving around a dormer may pass through several different drainage details within a short distance.
One problem can affect another area downstream.
For example, water leaving the side of a dormer may be directed toward a lower roof section or gutter. If that transition is poorly handled, moisture may show up well below the original intersection.
This is one reason complicated roof shapes require careful inspection rather than assuming every leak comes from the nearest damaged shingle.
Previous Repairs Can Hide the Original Failure
Roof-to-wall areas often accumulate repair history.
A homeowner may see several layers of roofing cement, sealant, metal patches, or replacement shingles around the same location.
Those materials can make diagnosis more difficult.
The newest patch may be covering an older detail without correcting it.
If water continues to enter, another repair layer may be added.
Eventually, the surface becomes complicated enough that the original flashing is difficult to inspect.
Repeated patching in one location can be a sign that the underlying transition should be examined more fully.
Interior Leak Locations Can Be Misleading
Water rarely respects the boundaries homeowners see inside the house.
Once it enters through a roof-to-wall joint, gravity can carry it along sheathing, framing, pipes, or other surfaces.
The ceiling stain may appear far from the actual entry point.
That is why a visible stain below a roof-wall intersection should be treated as a clue rather than proof of the exact leak location.
Professionals may need to inspect the exterior detail, attic, wall cavity, or nearby roofing to trace the route.
Simply repairing the roofing directly above the stain may miss the source.
What Should Be Checked Where Roofing Meets Siding?
A roof-to-wall inspection involves more than asking whether metal flashing is visible.
Several details can influence the performance of the intersection.
A roofer may look at:
- The condition and placement of step flashing
- How shingles overlap the flashing
- The condition of nearby siding or trim
- Whether water has a clear route away from the wall
- The bottom transition near the gutter
- Signs of repeated sealant repairs
- Corrosion or damaged metal
- Soft or stained roof decking
- Debris trapped along the wall
- Evidence of moisture below the intersection
For homeowners contacting a Roofing Company in Eugene, OR, describing exactly where the roof meets a wall can be more useful than simply saying there is a leak near the edge.
The shape of the intersection often gives the roofer important clues about what should be inspected first.
Roof Replacement Is a Good Time to Revisit Wall Flashing
Replacing shingles creates an opportunity to inspect details that may have remained partially hidden for years.
Old roof-to-wall flashing should not automatically be assumed to be suitable simply because it was already there.
The surrounding materials may have changed. Previous repairs may have altered the original installation. Corrosion, movement, or poor detailing may also have developed over time.
Once shingles are removed, the condition of the roof deck and flashing can be evaluated more clearly.
If the wall intersection has a history of leaks, replacement work provides a chance to address the drainage path rather than simply covering the same configuration with new materials.
Siding Work Can Affect Roofing Details Too
Roof-to-wall transitions are shared by two building systems.
That means roofing work is not the only activity that can affect them.
Siding replacement can disturb flashing, cover parts that should remain functional, or change the clearance between wall materials and the roof.
Trim work can create similar issues.
Whenever exterior wall materials are changed near a roof, the flashing relationship should be preserved.
One contractor may be working primarily on siding while the most vulnerable detail belongs partly to the roofing system.
Coordination prevents one finished surface from interfering with another system’s drainage.
Do Not Ignore Small Gaps Near Roof-Wall Intersections
A small opening may appear harmless because it is difficult to see from the ground.
Near a wall, however, runoff can be concentrated into that area repeatedly.
Water may enter only during wind-driven rain or when rainfall reaches a particular intensity.
That intermittent behavior can make the leak difficult to reproduce.
A stain might appear after one storm and stay dry through several others.
Homeowners should not assume the problem has corrected itself just because the ceiling remains dry for a while.
Weather conditions can change how water reaches the intersection.
Good Roof Details Control Water Instead of Fighting It
The strongest roof-to-wall details are based on a simple idea: water should be given a clear path back to the exterior.
Shingles shed water downhill. Flashing redirects it around interruptions. Kick-out details move concentrated runoff away from the wall. Siding and trim should allow those drainage layers to continue working.
Problems often arise when repairs try to stop water by sealing every visible joint without understanding where that water is supposed to go next.
A roof does not stay dry because every seam is permanently sealed.
It stays dry because overlapping materials guide water outward before it reaches vulnerable layers.
The Junction Deserves More Attention Than It Gets
Where a roof meets a wall, several materials are asked to work together in a very small space.
Shingles, flashing, siding, trim, gutters, and the roof deck all influence how water moves through the area.
That makes these intersections more sensitive than a broad, uninterrupted roof surface.
Homeowners who notice staining, repeated patches, deteriorated siding, or moisture near a dormer, chimney, or sidewall should think beyond the nearest shingle.
The real issue may be the transition between systems.
When those transitions are built and maintained correctly, water has a predictable path away from the house. When they are not, even a small defect can allow moisture to travel much farther than expected.